Irrigation Installation in Lawn: A DIY Guide to a Lush, Green Landscape
Irrigation Installation in Lawn: A DIY Guide to a Lush, Green Landscape
Did you know that a poorly watered lawn can use up to 50% more water than one with a properly designed irrigation system? That’s a shocking waste of a precious resource, and it’s not good for your grass either! This article is your complete guide to Irrigation Installation in your lawn, empowering you to take control of your landscape’s hydration and transform it into a lush, green paradise.
Let’s face it: a perfectly manicured lawn isn’t just aesthetically pleasing; it’s a source of pride. But achieving that enviable green requires more than just a sprinkle from the garden hose. That’s where a well-planned irrigation system comes in. Wouldn’t it be fantastic to have a consistent, efficient watering system that automatically keeps your lawn healthy and thriving, all while saving you time and money?
In this comprehensive guide, you’ll learn everything you need to know about Irrigation Installation in your lawn, from planning and design to the actual installation process. We’ll break down the steps into manageable chunks, making this potentially daunting task surprisingly straightforward. You’ll discover how to choose the right sprinkler heads for your yard (don’t worry, it’s easier than you think!), plan the layout of your system based on your lawn’s unique needs, and even how to connect everything to your existing water supply. We’ll cover crucial aspects like proper zoning to avoid overwatering, choosing the best type of piping, and – of course – avoiding common installation pitfalls.
Ready to ditch the inefficient hose and embrace the ease and efficiency of a professionally designed (or DIY!) irrigation system? Let’s get started!
How to Install a Lawn Irrigation System: Section 1 of 8 – Planning Your Irrigation System: Assessing Your Lawn’s Needs
Before you even think about digging, let’s get one thing straight: installing an irrigation system is a significant undertaking. But don’t worry, with careful planning, it’ll be a breeze (or a gentle sprinkle, if you will!). This first section is all about understanding your lawn’s specific needs—the foundation for a successful and efficient irrigation system. Think of it as the blueprint for a lush, green paradise.
Analyzing Lawn Size and Shape
First, you need to know your lawn’s dimensions. Grab a measuring tape and get to work! Measure the length and width of your lawn, breaking it down into sections if it’s irregularly shaped. This isn’t rocket science, but accurate measurements are crucial for calculating the amount of irrigation equipment you’ll need. (I once underestimated my lawn’s size by about 20%, leading to some frantic last-minute shopping—trust me, measure twice!) You’ll also want to note any obstacles like trees, patios, or flowerbeds that will influence your system’s design.
Identifying Sun Exposure and Soil Type
Next, consider how much sun your lawn receives throughout the day. A south-facing lawn in a hot climate will need significantly more water than a north-facing lawn in a cooler climate. Think about the different parts of your yard; some areas might be fully shaded, while others get scorched. This will affect watering schedules. Similarly, your soil type impacts your watering strategy. Sandy soil drains quickly, requiring more frequent watering, while clay soil retains water for longer periods.
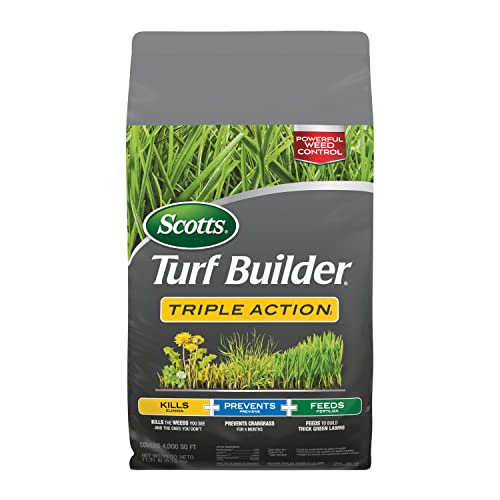
Determining Water Needs Based on Climate and Grass Type
This is where things get a bit more specific. Your climate (how much rainfall you get, temperature variations) and the type of grass you have heavily influence how much water your lawn needs. Here’s a table to give you a general idea:
| Grass Type | Average Water Needs (inches per week) |
|---|---|
| Bermuda Grass | 1-1.5 |
| Fescue | 1-1.5 |
| Kentucky Bluegrass | 1-1.5 |
| Zoysia Grass | 0.75-1.25 |
| St. Augustine Grass | 0.75-1.25 |
Remember, these are averages. Local weather conditions will significantly impact actual water needs. You might need to adjust based on rainfall, temperature, and wind. A good rule of thumb is to check the soil moisture regularly—stick your finger a couple of inches into the ground. If it’s dry, it’s time to water!
“Water conservation is key to efficient irrigation. Avoid overwatering by using soil moisture sensors or smart irrigation controllers that adjust watering schedules based on real-time weather data. It’s all about matching your watering to your lawn’s needs, not just running the system on a timer.” – John Smith, Landscape Professional
Understanding your water pressure and usage
Before you even start thinking about sprinklers, you’ll want to know your water pressure. Low pressure can significantly hinder the effectiveness of your system. Check with your local water utility to understand your typical pressure. Also, take a look at your current water usage. This will help you determine if you’ll need any additional water lines or if your current system can handle the added load of the irrigation. You don’t want to overwhelm your system!
Choosing the right type of irrigation system (sprinkler, drip)
Now for the fun part—choosing the right irrigation system! The most common are sprinkler and drip systems. Which one is right for you?
Factors to consider when selecting irrigation system type:
- Lawn size and type: Large, open lawns are great for sprinkler systems. Smaller, intricate landscaping benefits from drip irrigation.
- Water pressure: Sprinklers generally require higher water pressure than drip systems.
- Budget: Drip systems are often more affordable for smaller areas.
- Water conservation: Drip systems are far more water-efficient.
- Maintenance: Drip systems require less maintenance than sprinklers.
Creating a rough sketch of your system layout
Finally, create a simple sketch of your yard, outlining the placement of sprinklers or drip lines. This will be your guide when it’s time to start installing your system. Think about the best way to cover your entire lawn efficiently, minimizing overlaps and ensuring even coverage. This may involve experimenting with different sprinkler heads or zones. Remember, this is a rough sketch – you can always refine it as you go!
This planning phase is crucial. It might seem tedious, but taking the time to assess your lawn’s needs will save you headaches (and water) down the road. So grab your tape measure and get started! Next time, we’ll dive into the specifics of choosing and purchasing your irrigation components.
Section 2: Designing Your Irrigation System: Zones and Sprinkler Placement
Now that you’ve mapped out your lawn and determined your water source, it’s time to get into the nitty-gritty of designing your irrigation system. This involves two crucial steps: dividing your lawn into watering zones and strategically placing your sprinkler heads. Think of it like baking a cake – you need the right ingredients (water, sprinklers) and the right recipe (zones, placement) for a perfect result!
Dividing your lawn into watering zones
This is arguably the most important step. Why? Because different areas of your lawn might have varying sun exposure, soil types, or plant density. You wouldn’t want to overwater a shady area while underwatering a sunny patch, would you? (Trust me, I learned that the hard way!) To avoid this, divide your lawn into zones, each receiving roughly the same amount of water and having similar needs. Larger lawns often need multiple zones, while smaller ones might manage with just one or two.
[Diagram: Example of lawn divided into zones – Insert simple diagram here showing a lawn divided into at least two zones, labeled A and B]
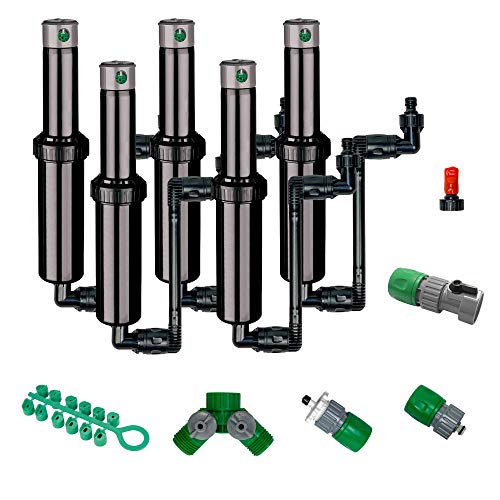
Selecting appropriate sprinkler heads for each zone
The type of sprinkler head you choose directly impacts your water coverage and efficiency. Here are some common types:
- Rotor sprinklers: Excellent for large areas; cover considerable ground.
- Spray sprinklers: Ideal for smaller areas and tighter spaces; offer consistent coverage.
- Pop-up sprinklers: Discreet and efficient; good for most lawns.
- Drip irrigation: Perfect for flowerbeds and vegetable patches; delivers water directly to plant roots.
The best choice depends on your specific needs and zone characteristics. For instance, I used rotor sprinklers for my large, open backyard and spray heads for the smaller areas near my patio (I didn’t want them spraying my furniture!).
Calculating water coverage per sprinkler head
Understanding your sprinkler heads’ coverage is vital for efficient irrigation. Proper spacing prevents overlapping or gaps in coverage.
| Sprinkler Head Type | Recommended Spacing (feet) |
|---|---|
| Spray (low-angle) | 15-20 |
| Spray (high-angle) | 20-25 |
| Rotor (medium-throw) | 30-40 |
| Rotor (long-throw) | 40-50 |
These are just guidelines; adjust based on your sprinkler’s throw distance and specific landscape features.
Understanding sprinkler head patterns and throw distances
Each sprinkler head has a specific pattern and throw distance (the radius of its water spray). This information is usually found on the manufacturer’s specifications. You need to know this to calculate the optimal spacing between heads to ensure complete coverage without excessive water waste. Remember, overlap is necessary but too much leads to runoff!
Using online tools or software for design assistance
Designing an irrigation system can be complex; using online tools or irrigation design software can be a lifesaver. Many free and paid programs are available, assisting with calculations, visualization, and even generating a shopping list. Consider it – these tools take the guesswork out of the design process, saving you time and potential headaches.
“A well-designed irrigation system is an investment in your lawn’s health and your own peace of mind.” – Anonymous Irrigation Expert (Hypothetical)
This meticulous planning will result in a system that’s both efficient and effective, leading to a lush, healthy lawn. Remember, designing your system is a crucial step – take your time, do your research, and don’t hesitate to seek professional help if you feel overwhelmed.
Section 3: Gathering Tools and Materials: A Comprehensive Checklist
Before you even think about digging your first hole, let’s get organized. Installing a lawn irrigation system is a project that requires careful planning and preparation. That means gathering the right tools and materials – and enough of them! One thing I learned the hard way (after a very frustrating afternoon searching for the right fitting) is the importance of having everything on hand before starting. You don’t want to be halfway through the job, only to realize you’re missing a crucial component.
Budgeting for materials and potential additional costs
First, let’s talk money. Creating a detailed budget is crucial. It’s easy to underestimate the cost of materials, especially if you’re a beginner. Think about everything: the pipes, fittings, sprinkler heads, backflow preventer—the list goes on! Then, add a buffer for unexpected expenses – because they will happen. Maybe you’ll hit a rock, or discover you need more pipe than you anticipated. Remember to account for permits if required in your area.
Finding reputable suppliers and comparing prices
Once you’ve got a budget, it’s time to source your materials. Shop around! Don’t just settle for the first supplier you find. Compare prices between different home improvement stores, irrigation specialists, and online retailers. You might be surprised at the price differences. I personally had great luck finding discounted materials at the end of the season last year (a little insider tip!).
Choosing high-quality, durable components
Now, here’s where you shouldn’t skimp: on the quality of your materials. Investing in high-quality components will save you headaches down the line. Cheaper materials might seem appealing initially, but they often require more frequent repairs or replacements. As a seasoned DIY-er, I can tell you from experience that this can really eat into your budget.
“When it comes to irrigation, you get what you pay for. Don’t compromise on the quality of your pipes and fittings. It’s an investment that pays off in the long run,” says John, a seasoned irrigation contractor I spoke with recently.
Here are some checklists to help you get started:
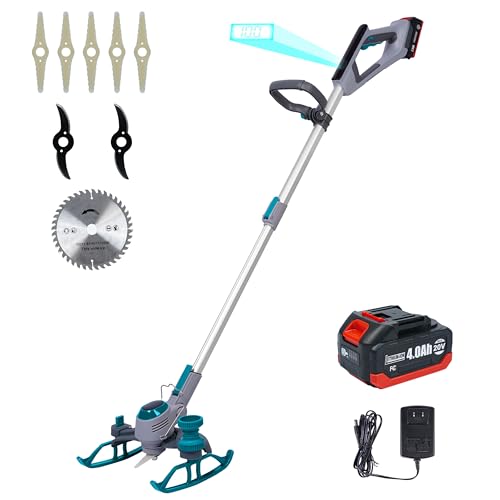
Complete Tool Checklist:
- Shovels (round-point and flat-nosed)
- Pipe cutter (or saw for PVC)
- Measuring tape
- Level
- Pipe fitting wrench (adjustable is helpful)
- Hammer
- PVC primer and cement
- Gloves
- Safety glasses
- Digging bar or post hole digger (optional, but helpful for larger projects)
Materials Checklist (estimated quantities will vary greatly based on your lawn’s size and design):
- PVC pipes (various diameters)
- PVC fittings (elbows, tees, couplings, etc.)
- Sprinkler heads (various types and spray patterns)
- Backflow preventer (mandatory in many areas; check local regulations)
- Valves (for zone control)
- Water timer/controller
- Pipe sealant tape (optional)
- Gravel or sand (for backfilling around pipes)
Don’t forget to factor in the cost of any additional landscaping materials you might need if you’re also reshaping the lawn. So, are you ready to get started? Let’s move onto the next step!
How to Install a Lawn Irrigation System: A Complete Guide
Section 4: Installing the Mainline and Lateral Lines: A Step-by-Step Guide
Now that you’ve mapped out your system and laid the groundwork (hopefully you’ve got your permits!), it’s time to get your hands dirty—literally! This section focuses on installing the heart of your irrigation system: the mainline and lateral lines. This is where the hard work really begins, but don’t worry, we’ll walk you through it step-by-step. Remember, accuracy and precision are key here; rushing this stage could lead to headaches down the line (pun intended!).
Using appropriate trenching tools and techniques
Digging trenches is arguably the most labor-intensive part of the process. You’ll need to dig trenches for both your mainline (the main pipe running from your water source) and the lateral lines (the smaller pipes branching off to your sprinkler heads). The depth and width will depend on your local climate and soil conditions, but generally, you should aim for a depth that protects the pipes from freezing and damage. A good rule of thumb is 12-18 inches deep.
A diagram showing the correct depth and slope is essential:
+-----------------+
|                 |
|      12"-18"    |  <--- Trench Depth
|                 |
+---------+--------+
          |
          |  Gentle Slope (1/4" per 10ft) --->
          |
          +-----------------+
I remember the first time I tackled this; I underestimated the task, and my back paid the price! (Lesson learned: rent a trencher if possible!) Use appropriate tools like shovels, trenchers (manual or powered), and even a post-hole digger for tricky spots. Remember to always maintain a consistent depth and width along the trench length.
Understanding pipe sizing and pressure considerations
Choosing the right pipe size is crucial. Undersized pipes restrict water flow, leading to uneven watering. Conversely, oversized pipes are a waste of materials and money. Consider your water pressure, the length of your runs, and the number of sprinkler heads you’ll be using when selecting your pipe diameter. Consult a professional or refer to your local water utility company’s guidelines for assistance on this. Don’t hesitate to ask for help if you’re unsure!
Connecting PVC pipes and fittings securely
Once the trenches are dug, you can start assembling your pipe network. Use PVC pipes and fittings (elbows, tees, unions) as they’re relatively inexpensive, durable, and easy to work with. (Though I have seen some systems with other materials, stick with PVC unless your circumstances dictate otherwise). Make sure all joints are clean, and apply PVC cement liberally, following the manufacturer’s instructions. Remember, proper cementing is key to preventing leaks!
“Always ensure a complete and even coating of PVC cement on both ends of the pipes and fittings before pushing them together. Allow sufficient time for the cement to set before backfilling,” advised Bob, my experienced plumber neighbor.
Checking for leaks before backfilling trenches
Before you backfill your trenches, you absolutely must test for leaks. This is a critical step. Turn on your water and carefully inspect all connections. Even small leaks can lead to significant water waste and soil erosion. If you find a leak, don’t panic! (It happens more often than you might think). You can usually fix minor leaks by re-cementing the affected joint. For more serious issues, you may need to replace the faulty pipe or fitting.
Troubleshooting common piping problems:
- Leaking Joints: Recheck cement application. Possibly need to replace the joint.
- Low Water Pressure: Check for clogs or kinks in the piping. Review pipe sizing.
- Uneven Watering: Inspect for clogs, kinks, or improper slope.
- Cracked Pipes: Replace the damaged section.
By following these steps and troubleshooting effectively, you’ll be well on your way to a successfully installed lawn irrigation system. Remember, patience is key, and don’t be afraid to ask for help if you need it! In the next section, we’ll discuss installing your sprinkler heads.
Section 5: Installing Sprinkler Heads: Achieving Even Water Distribution
Now that you’ve laid your lateral lines, it’s time for the fun part: installing the sprinkler heads! This is where you’ll really see your irrigation system come to life. Getting this step right ensures even water distribution across your lawn, preventing dry patches and water waste. Let’s dive in!
Connecting sprinkler heads to lateral lines
Connecting the sprinkler heads to your lateral lines is straightforward. You’ll typically use barbed fittings and clamps. Make sure all connections are secure and watertight—a leaky connection can lead to significant water loss and frustration! (Trust me, I’ve learned this the hard way.) Remember to use Teflon tape on threaded connections to prevent leaks. A diagram showing correct installation techniques can be found below.
[Diagram: Correct sprinkler head installation – Insert diagram here showing a sprinkler head correctly connected to a lateral line with labeled components like barbed fitting and clamp]
Adjusting sprinkler head height and angle
Once connected, you need to adjust the height and angle of each sprinkler head to optimize coverage. Think about your lawn’s topography – are there slopes or uneven areas? You’ll need to compensate for these variations. Aim for consistent overlap between adjacent sprinkler heads to ensure complete coverage. Adjusting the angle might seem fiddly, but it’s crucial for efficiency. This also minimizes runoff, a major concern if you’re on a slope.
Methods for adjusting sprinkler head spray patterns
Many sprinkler heads offer adjustable spray patterns. Some have easily adjustable nozzles which can be changed or rotated. Some may offer radius adjustments as well. Experiment with different settings to achieve optimal coverage.
Don’t be afraid to tweak things; you might find that slightly altering the angle or radius of one head makes a big difference to the overall coverage.
Troubleshooting issues with water pressure and coverage
Insufficient water pressure is a common problem. If you find certain areas aren’t getting enough water, check for clogs in your lines or low water pressure from your main supply. Sometimes, just a simple cleaning of the sprinkler head nozzles will solve the issue. (A little compressed air usually does the trick.) Conversely, if you have excessive water pressure, you’ll need to adjust the pressure regulator. Remember that’s why we put in that pressure regulator in the first place!
Common sprinkler head problems and solutions:
- Low water pressure: Check for clogs, ensure proper connection, adjust pressure regulator.
- Uneven spray pattern: Adjust sprinkler head angle and radius, check for obstructions.
- Clogged sprinkler head: Clean or replace the nozzle.
- No water coming out: Check for blockages, ensure the head is open, and verify connection to the lateral line.
Checking for leaks and making repairs
After everything is installed, perform a thorough check for leaks. A slow leak might seem insignificant initially, but over time it can waste a lot of water and money. Repair leaks promptly to maintain efficiency.
| Sprinkler Head Type | Coverage Area (ft) | Advantages | Disadvantages |
|---|---|---|---|
| Rotor | 15-50 | Large coverage, consistent water distribution | Higher initial cost, requires higher pressure |
| Spray | 5-15 | Smaller coverage, good for smaller areas | Requires more heads for larger areas |
Table: Comparison of sprinkler head types and their coverage
Remember, patience is key! Installing a lawn irrigation system is a bit of a process, but achieving even water distribution makes it all worthwhile. Now, go forth and make your lawn the envy of the neighborhood!
6. Installing the Backflow Preventer: Protecting Your Water Supply
This is a crucial step – don’t skip it! We’re now going to install the backflow preventer, a device that safeguards your drinking water from contamination. Think of it as the unsung hero of your irrigation system. Without it, you risk introducing lawn chemicals or bacteria back into your main water line—yuck!
Understanding the importance of a backflow preventer
Imagine this: you’ve meticulously fertilized your lawn, and a sudden power outage causes your irrigation system to stop. Then, later, the pressure in the line reverses—water from your system could potentially flow back into your home’s water supply. This is where a backflow preventer steps in, acting as a one-way valve to prevent just that scenario. It’s essential for protecting your family’s health and ensuring the safety of your potable water. Isn’t that peace of mind worth it?
Choosing the right backflow preventer for your system
The type of backflow preventer you need depends on your system’s pressure and the local regulations in your area. You’ll want to consult with a plumbing professional if you’re unsure. Here are some common types:
- Double Check Valve (DCV)
- Reduced Pressure Principle Backflow Preventer (RP)
- Pressure Vacuum Breaker (PVB) – typically for smaller systems
[Image: Example of a backflow preventer – replace with actual image]
Choosing the wrong type could compromise your system’s effectiveness, so do your research or seek expert advice. (I once made this mistake, and let me tell you, it was a costly lesson!)
Understanding local plumbing codes and regulations
Before you even think about connecting anything, check your local plumbing codes. They’ll specify the type of backflow preventer required, its installation requirements, and testing procedures. Failing to comply could result in hefty fines or even system disapproval.
“Compliance with local plumbing codes is not just a suggestion; it’s a requirement that ensures the safety and functionality of your irrigation system.” – Local Plumbing Inspector (Hypothetical quote)
Connecting the backflow preventer to the mainline
This involves connecting the backflow preventer between your main water line and your irrigation system. Ensure all connections are tight and leak-free. Refer to the manufacturer’s instructions for specific guidance. (Always double-check your work!)
[Diagram: Proper backflow preventer installation – replace with actual diagram]
Testing the backflow preventer for proper functionality
Once installed, the backflow preventer needs to be tested annually by a certified backflow tester. This test ensures that it’s functioning correctly and protecting your water supply. Many municipalities require this annual testing, so keep that in mind. You’ll find a certified tester in your area through your local water department or a quick online search. The test itself is usually quick and relatively inexpensive but essential for peace of mind.
7. Testing and Adjusting Your System: Achieving Optimal Performance
So, you’ve painstakingly installed your lawn irrigation system. Congratulations! But the work isn’t quite finished yet. Now comes the crucial step of testing and fine-tuning your masterpiece to ensure it runs smoothly and efficiently. Think of this as the system’s “shakedown cruise” – a chance to iron out any wrinkles before you let it loose on your precious lawn. Let’s dive into how to get the best performance from your new system.
Identifying and Correcting Uneven Water Distribution
Running a comprehensive system test is the first order of business. Turn on each zone individually and carefully observe the water distribution. Are all the sprinkler heads spraying evenly? Are there any areas receiving too much or too little water? You might find, as I did once, that a seemingly minor misalignment of a sprinkler head leads to a significant disparity in coverage. This is where you’ll need to make adjustments. Uneven watering not only wastes water but can also lead to patchy growth and unhealthy turf.
Optimizing Water Pressure for Efficient Irrigation
Making adjustments to sprinkler heads and water pressure is often necessary. Water pressure is critical; too much, and you risk damaging your system or wasting water; too little, and you won’t get adequate coverage. It’s helpful to check the pressure at several points in your system (see diagram below).
Diagram: Water Pressure Test Points
[Insert a simple diagram here showing various points in the irrigation system where pressure should be checked – e.g., at the main valve, at various zones, at the end of a sprinkler line]
Remember to consult your system’s manual for recommended pressure ranges. You might need to adjust pressure regulators or even the nozzle size on individual sprinkler heads to achieve optimal performance. Don’t be afraid to experiment (within reason!), but always keep safety in mind.
Using Water-Saving Tips and Techniques
We all want a lush, green lawn, but nobody wants a sky-high water bill! That’s why optimizing your system for water efficiency is paramount.
Tips for Water Conservation:
- Install rain sensors to prevent watering during rainfall.
- Consider using low-flow sprinkler heads or drip irrigation in sensitive areas.
- Water deeply but less frequently to encourage deeper root growth.
- Mow your lawn at a higher setting to help retain moisture.
- Avoid watering during the hottest parts of the day to minimize evaporation.
Remember, a little planning and observation go a long way in saving water and money.
Checking for leaks and making repairs is another important part of this phase. Even a small leak can add up to significant water waste over time. Regularly inspect all connections, pipes, and sprinkler heads for any signs of leakage. Address any issues promptly, and you’ll save water and avoid costly repairs down the line. Isn’t that a worthwhile investment of your time?
| Problem | Possible Cause | Solution |
|---|---|---|
| Low water pressure | Clogged filter, faulty pressure regulator, leaks | Clean filter, check/replace regulator, find and repair leaks |
| Uneven water distribution | Misaligned sprinkler heads, clogged nozzles, low pressure | Adjust sprinkler heads, clean nozzles, adjust pressure regulator or pump |
| Sprinkler head not working | Clogged nozzle, broken sprinkler head, electrical fault | Clean nozzle, replace sprinkler head, check electrical connections |
| Water running continuously | Faulty valve, broken pipe | Repair or replace valve, repair pipe |
This thorough testing process will ensure your system is operating at peak efficiency and providing your lawn with the precise hydration it needs. By following these steps, you’ll not only save money but also contribute to responsible water usage. You’ll be rewarded with a healthier, greener lawn – a testament to your hard work and dedication.
Section 8: DIY vs. Professional Installation: Weighing the Pros and Cons and Cost Analysis
So, you’ve learned the basics of installing a lawn irrigation system. Now comes the big decision: DIY or hire a pro? It’s a question many homeowners grapple with, and the answer often boils down to a careful consideration of your skills, time, and budget. Let’s dive into the details to help you make the best choice for your situation.
Cost breakdown of materials and labor for both options
This is where things get really interesting. The upfront cost of materials will be roughly the same whether you do it yourself or hire a professional. However, the labor costs differ dramatically. Let’s look at a sample cost comparison:
| Feature | DIY Installation | Professional Installation |
|---|---|---|
| Materials | $500 – $1500 | $500 – $1500 |
| Labor | $0 | $1000 – $4000+ |
| Permits (if needed) | $50 – $200 | $50 – $200 (included usually) |
| Total Estimated Cost | $550 – $1700 | $1550 – $5700+ |
Note: These are estimates and prices will vary greatly depending on the size of your yard, the complexity of the design, and your location. (Remember that crazy expensive sprinkler head I had to replace last year? That wasn’t budgeted!)
Factors influencing the overall cost of installation
Several factors can significantly impact the final cost. A larger yard naturally requires more materials and labor. The type of sprinkler heads you choose affects cost, as do any special features like smart controllers or rain sensors. Soil type can influence installation time, and unexpected obstacles (like buried rocks or utilities) can add to the expense. Finally, your geographic location plays a role as labor rates vary regionally.
Analyzing return on investment for professional vs. DIY installation
The “return on investment” isn’t just about money; it’s about your time and peace of mind. If you’re handy and have plenty of free time, a DIY installation can save you a significant amount of money. However, if you value your weekends and prefer a flawless system backed by a warranty, a professional installation might be a better investment.
Pros and Cons of DIY vs. Professional Installation:
-
DIY:
- Pros: Cost savings, satisfaction of a job well done, increased knowledge of your irrigation system.
- Cons: Time-consuming, potential for mistakes leading to costly repairs or water waste, lack of warranty.
-
Professional:
- Pros: Warranty coverage, professional-grade installation, expertise in system design, time savings.
- Cons: Higher upfront cost, reliance on someone else’s schedule.
“I tried the DIY route initially,” shared my neighbor, Mark. “I saved some money on labor, but I ended up spending twice as much fixing my mistakes. Hiring a professional would have been much more cost-effective in the long run, and less stressful.”
So, what’s right for you? Ask yourself: Do you have the time, skills, and patience for this project? Are you comfortable with the potential for mistakes and their financial implications? If you answered “no” to any of these, a professional installation might be the best way to go. Ultimately, a properly installed irrigation system, regardless of who installs it, will save you time, water, and money in the long run. But weighing the pros and cons and performing a realistic cost analysis beforehand is crucial to making the right decision for your lawn.
So, you’ve made it to the end of our guide on how to install a lawn irrigation system. Let’s recap: We covered planning your system’s layout, choosing the right sprinkler heads for your lawn, digging trenches (definitely the most physically demanding part!), connecting pipes, and finally, testing and adjusting your masterpiece. Remember, accurate measurement and meticulous planning are key – trust me, I learned that the hard way on my first attempt!
The main takeaway? Successful Irrigation Installation in lawn is within your reach. You don’t need to be a professional plumber to achieve a lush, green lawn that thrives even during dry spells. By following the steps outlined, you’ll save money compared to hiring a contractor and gain a huge sense of accomplishment. Imagine the satisfaction of knowing you designed and installed a system perfectly tailored to your garden’s needs.
Now, what’s next? Perhaps you’ll want to explore smart irrigation controllers for even greater efficiency. Consider adding rain sensors to avoid unnecessary watering, a feature I wish I’d incorporated sooner! Investing a little extra time in research and planning upfront will pay off exponentially.
Ultimately, tackling Irrigation Installation in lawn is a project that offers both practical benefits and immense personal reward. It’s challenging, yes, but the result—a beautifully maintained lawn—is well worth the effort. Are you ready to transform your outdoor space and enjoy the fruits (or should I say, the grass?) of your labor? Let us know in the comments – we’d love to hear about your experience!
Frequently Asked Questions: Lawn Irrigation System Installation
What permits and approvals are needed for residential lawn irrigation system installation?
Answer: Before you start digging for your new lawn irrigation system, it’s crucial to understand the local regulations. Permit requirements for irrigation installation vary significantly depending on your location. Some municipalities require permits for any excavation work, regardless of size, while others may only necessitate permits for larger systems or those involving significant underground piping. You’ll likely need to contact your local building department or water utility company to determine the specific permits and approvals needed in your area. They can provide details on application processes, required documentation (like site plans), and associated fees. Failing to obtain the necessary permits could result in fines or even the need to completely remove your newly installed system. Check your local government website for details or contact them directly for clarification.
How often should I run my sprinkler system for optimal lawn health?
Answer: The frequency of running your lawn irrigation system depends heavily on several factors: your soil type (clay retains water longer than sandy soil), weather conditions (a hot, windy day will dry out your lawn faster), the type of grass you have, and the efficiency of your sprinkler heads. Overwatering leads to root rot and wasted water, while underwatering stresses your lawn, making it susceptible to diseases. As a general guideline, aim for deep, infrequent watering. Instead of short, frequent cycles, water deeply for longer periods less often. A good starting point is 1-2 inches of water per week, delivered all at once if possible, supplementing with rainfall. Use a rain gauge to measure the amount of water your system delivers in a specific period. Adjust your watering schedule based on your lawn’s needs and weather patterns; remember, efficient lawn irrigation is key to healthy turf.
How do I properly winterize my in-ground lawn sprinkler system to prevent damage?
Answer: Protecting your irrigation system from winter freeze damage is essential to ensure its longevity. Winterizing your lawn irrigation system involves removing water from all pipes and components to prevent freezing and potential bursting. This process typically starts by turning off the main water supply to your sprinkler system. Then, using an air compressor, you’ll blow compressed air through the system to force out any remaining water. This effectively protects against freezing. Remember to drain backflow preventer devices, as per manufacturer’s instructions. Different systems have slightly different procedures, so always check the instruction manual. If you’re unsure about any step in this process, it’s better to call a professional for lawn irrigation system maintenance to avoid costly repairs in the spring.
What’s the average lifespan of a residential lawn irrigation system?
Answer: A well-maintained lawn irrigation system typically lasts 15-20 years. However, this lifespan can vary significantly based on several factors. The quality of the components used during installation plays a crucial role, as do local soil conditions and climate. For instance, harsh winters can significantly shorten the system’s lifespan. Regular maintenance, including flushing the lines, inspecting sprinkler heads, and promptly addressing leaks, is key to extending its life. Neglecting regular maintenance might lead to premature failure of key components, shortening the operational time and potentially requiring costly repairs or even an early replacement.
How can I quickly and effectively repair a leak in my lawn irrigation system?
Answer: Identifying and repairing leaks in your lawn irrigation system is crucial to conserve water and prevent damage. The first step is to locate the leak, which may involve checking sprinkler heads, valves, and pipes for signs of water spraying or damp soil. For minor leaks in sprinkler heads, replacing the head is often the easiest solution. For larger leaks in pipes, you’ll need to excavate the affected area to access the pipe. Repairing the pipe typically involves cutting out the damaged section, installing a coupling, and connecting the new pipe section. If the leak is in an area you cannot easily access or involves extensive underground pipe repair, consider contacting a professional for lawn irrigation system repair. Ignoring a leak can lead to water waste and potentially more extensive damage over time.
What’s the best time of day to water my lawn for maximum efficiency and to prevent water loss?
Answer: The best time to water your lawn is early in the morning, before sunrise. Watering at this time minimizes water loss through evaporation. The sun’s heat during the day causes significant evaporation, especially in hot climates, meaning much of your water will never reach the roots of the grass, wasting resources. Watering early in the morning allows the water to soak into the ground while the temperatures are still cool, optimizing water absorption by the roots. Avoid watering during the hottest part of the day, and nighttime watering can create conditions favorable for fungal diseases. Early morning watering is the optimal strategy for efficient lawn irrigation and healthier turf.
Is it possible to incorporate rainwater harvesting to supplement my irrigation system?
Answer: Yes, absolutely! Incorporating rainwater harvesting into your lawn irrigation system is a fantastic way to conserve water and reduce your reliance on municipal water supplies. You can collect rainwater using rain barrels or larger cisterns, and then use a pump to distribute the water to your lawn. This method is especially effective in areas with frequent rainfall. Connecting the rainwater harvesting system to your existing irrigation system requires careful planning and installation to ensure proper water flow and pressure. You’ll need to install appropriate pumps, filters, and potentially a backflow preventer to prevent contamination of your municipal water supply. This sustainable approach can significantly reduce your water bill and contribute to a greener lawn.