Ultimate Guide to Lawn Mower Repair: DIY Troubleshooting and Fixes
Did you know that a surprising number of perfectly good lawn mowers end up in landfills each year, simply because of minor issues? Don’t let your trusty machine become another statistic! This comprehensive guide on lawn mower repair will equip you with the knowledge and confidence to tackle those pesky problems yourself. You’ll save money, reduce waste, and gain a sense of accomplishment—all while keeping your lawn looking its best.
This isn’t rocket science, folks. We’ll walk you through common lawn mower repair issues, from simple blade sharpening (which, by the way, is often all it takes!) to more complex carburetor cleaning and engine troubleshooting. You’ll learn how to identify the problem, source the necessary parts (if needed, of course – sometimes it’s just a loose screw!), and complete the repair safely and effectively.
We’ll cover everything from diagnosing the dreaded “won’t start” scenario – a common cry of many a homeowner – to understanding the basics of engine maintenance. We’ll also show you some clever tricks to troubleshoot specific components, like the spark plug or air filter. (A clogged air filter is often the culprit behind surprisingly sluggish performance.) Isn’t that worth knowing? And don’t worry if you’re not a mechanic—this guide is written for beginners, focusing on simple, practical solutions.
So, are you ready to roll up your sleeves and get your hands dirty? Let’s dive into the world of lawn mower repair and get that green machine humming again!
Table of Contents
Common Lawn Mower Problems and Troubleshooting
So, your lawnmower’s decided to take a vacation? Don’t panic! Before you call a professional (and potentially spend a small fortune), let’s troubleshoot the issue together. This section will help you identify common lawn mower problems and guide you through some basic fixes. We’ll learn to diagnose the problem, saving you both time and money. Remember, a little DIY can go a long way!
First things first: Identifying symptoms is crucial. Is your mower refusing to start entirely? Does it sputter and die? Or is it starting fine, but the cutting performance is subpar? Identifying the exact issue is half the battle. Then we’ll move onto some basic checks.
Basic checks involve things you can easily verify yourself. Check the fuel level – sounds obvious, but you’d be surprised how many times this is the culprit! (I once spent an hour diagnosing a problem only to realize I was out of gas – don’t be like me!). Next, look for a spark. If there’s no spark, the ignition system is likely the problem. Finally, check the blade condition. A dull or damaged blade won’t cut effectively.
Let’s create a simple troubleshooting flowchart. This can help you systematically eliminate possibilities. Start by asking yourself the primary question: “Will my mower even start?” If yes, proceed to check cutting performance. If no, we’ll dive into starting issues.
Engine won’t start: Fuel, spark, and compression issues
This is probably the most common problem. Here’s what we’ll check:
- Fuel: Is the tank empty? (Always check this first!) Is the fuel fresh and clean? Old gas can gum up the works.
- Spark: This requires a bit more know-how, but you can use a spark tester (available at most hardware stores) to see if there’s a spark reaching the spark plug. If not, you might need a new spark plug, or there might be a problem with the ignition coil or wiring.
- Compression: If you’ve got fuel and spark but still no start, low compression might be the issue. This requires a compression tester and a bit more mechanical understanding.
Poor cutting performance: Blade sharpening, deck clogging
Even if your mower starts, it might not cut properly.
- Blade Sharpening: A dull blade is the most frequent cause of poor cutting. A sharp blade cleanly cuts the grass, while a dull one tears and shreds it, leaving an uneven and unhealthy-looking lawn. Sharpening the blade is often a straightforward task, with many tutorials available online.
- Deck Clogging: Grass clippings can build up under the mower deck, hindering the cutting process. Regularly cleaning the deck is crucial for optimal performance.
Here’s a table summarizing common problems and their likely causes:
| Problem | Likely Causes |
|---|---|
| Won’t Start | Empty fuel tank, bad spark plug, low compression |
| Poor Cutting | Dull blade, clogged deck, incorrect cutting height |
| Engine Surges/Stalls | Dirty air filter, carburetor problems |
| Engine Overheats | Low oil, clogged cooling fins |
Remember, safety first! Always disconnect the spark plug before performing any maintenance.
“The greatest danger for most of us is not that our aim is too high and we miss it, but that it is too low and we reach it.” – Michelangelo
This quote reminds us that tackling lawn mower repair is a worthwhile challenge, and with a methodical approach, it’s entirely achievable. Don’t be intimidated by the prospect of fixing your lawnmower; a little patience and the right guidance can save you a lot of money and frustration. You’ve got this! Now, let’s move on to more specific repair procedures in the next section.
Lawn Mower Engine Repair: Fundamentals
Okay, let’s get down to the nitty-gritty of fixing your lawn mower’s engine. This is where things get a little more involved, but don’t worry, I’ll guide you through it. Before we dive in, remember – safety first! (Seriously, I learned that the hard way once with a rogue flying bolt.) This section covers the basics you’ll need to know to tackle engine repair.
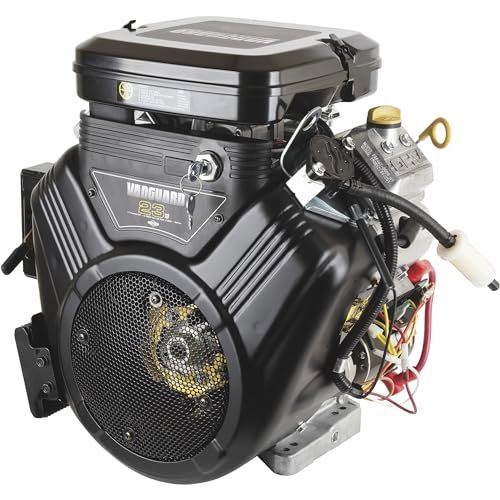
Understanding Basic Small Engine Components
Before you even think about turning a wrench, it’s crucial to understand the basic components of a small engine. Most lawn mower engines are surprisingly similar, consisting of key parts like the carburetor (which mixes fuel and air), the cylinder (where combustion happens), the piston (which moves up and down), the crankshaft (which converts piston movement into rotary motion), and the spark plug (which ignites the fuel-air mixture). Understanding how these parts work together is essential for troubleshooting.
Identifying Engine Types (4-Stroke vs 2-Stroke)
Lawn mowers typically use either 4-stroke or 2-stroke engines. Knowing which type you have is vital, as their operation and maintenance differ significantly. 4-stroke engines have a smoother, more efficient operation, requiring oil in a separate crankcase. 2-stroke engines, on the other hand, mix oil directly with the fuel. Check your owner’s manual – it’ll clearly state the engine type. (If you don’t have the manual, there are usually labels on the engine itself.)
Safety Precautions and Necessary Tools
Safety is paramount. Always disconnect the spark plug before performing any engine work – this prevents accidental starting. Wear safety glasses and gloves to protect yourself from flying debris or spills. What tools will you need? You’ll probably want:
- A socket set (with various sizes)
- Screwdrivers (Phillips and flathead)
- Pliers
- Wrench(es)
- Spark plug wrench
- A small container for collecting oil or fuel
 (Replace placeholder with actual image)
Troubleshooting Engine Starting Problems
Let’s say your mower won’t start. Don’t panic! The most common culprit is a bad spark plug. Other possibilities include a clogged air filter, a fuel problem (empty tank, bad gas, clogged fuel line), or a faulty carburetor. Systematic troubleshooting is key. Check each component one by one – it’s like playing a game of elimination.
Spark Plug Replacement and Cleaning
Replacing or cleaning the spark plug is often the first step in troubleshooting. Remember that quote, “A bad spark plug is the most common cause of engine failure”? Well, it’s pretty much true for lawnmowers too!
“If your lawnmower won’t start, check the spark plug first; 9 times out of 10, that’s your problem.” – Old Mechanic’s Wisdom
To replace it, disconnect the spark plug wire, unscrew the old spark plug (using the appropriate wrench), and replace it with a new one of the correct type. For cleaning, carefully brush the electrode using a wire brush to remove any carbon buildup. If the electrode is badly worn, it’s best to replace the spark plug. But isn’t it satisfying to get that spark plug firing again?
Remember, this is just the beginning of your lawn mower repair journey. But with patience, the right tools, and a dash of confidence, you can tackle many mower problems. Now, go forth and fix that mower!
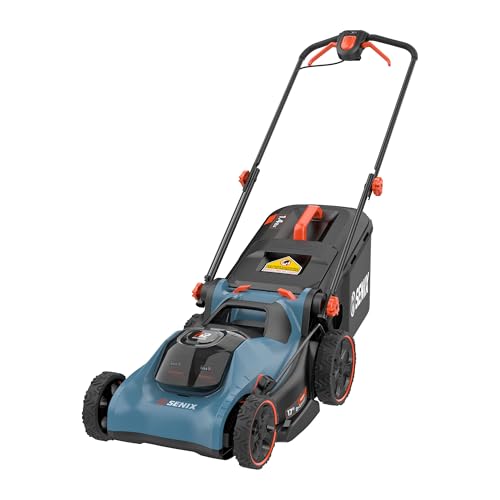
How to Sharpen and Replace a Lawn Mower Blade
Alright, let’s tackle one of the most important aspects of lawn mower maintenance: the blade. A dull blade doesn’t just give you a ragged cut; it can actually damage your lawn and put extra strain on your mower’s engine. So, let’s learn how to keep that blade sharp and replace it when necessary.

Identifying blade damage and wear
Before you even think about sharpening or replacing, you need to assess the damage. Inspect your blade carefully. Look for:
- Significant nicks or chips: These are major damage indicators and usually mean replacement is the best solution.
- Rounded or dull edges: This is the most common issue – a dull blade won’t cut cleanly.
- Bent blade: A bent blade is inefficient and can cause vibrations. You might be able to straighten a minor bend, but severe bends usually require replacement.
- Excessive rust: Rust weakens the blade and makes it less effective.
Remember, a slightly dull blade might seem like a minor issue, but it’ll quickly become a significant problem. Trust me on this; I once tried to power through with a seriously dull blade, and it took me twice as long and left my lawn looking awful! Don’t be like me!
Choosing the right replacement blade
If replacement is necessary, getting the right blade is crucial. The wrong blade won’t fit, and using an incorrect one could damage your mower. Always refer to your mower’s manual. It will specify the exact blade type and size you need. You can usually find this information online, too. Here’s what you need to consider:
- Blade size and shape: Measure your old blade carefully (length and width). The exact shape is crucial for proper fitting.
- Blade material: Most blades are steel, but some are made of other metals. Matching materials is generally recommended.
- Mower model: The blade type is specific to the mower model, so this information is vital.
Safety procedures for blade removal and sharpening
Before you even touch the blade, SAFETY FIRST! This is non-negotiable.
- Disconnect the spark plug. This is the most important safety step. You absolutely must disconnect the spark plug to prevent accidental starting.
- Wear safety glasses and gloves. These protect your eyes and hands from flying debris.
- Use the proper tools. You’ll need a wrench (usually a socket wrench) to remove the blade bolt, and possibly a blade balancer (if you intend to reuse the blade after sharpening).
- Work in a well-lit area. You’ll need good visibility to avoid accidents.
Methods for sharpening
You have a couple of options for sharpening:
- Using a file: This is a more manual method, requiring patience and a steady hand. You’ll need a good quality metal file designed for sharpening. Watch the video above for guidance. (I found it much easier than expected!)
- Using a grinding wheel: A grinding wheel is faster but requires more care to avoid overheating and damaging the blade. This is probably best left to those with experience using grinding equipment.
Remember to maintain a consistent angle during sharpening to keep the blade balanced.
Blade replacement process
Once you have your new blade, the installation is the reverse of the removal process. Make sure the blade is securely fastened, and check its alignment before starting your mower.
- Attach the new blade: Align the blade with the mounting holes and carefully tighten the bolt.
- Check blade alignment: Make sure the blade spins freely and doesn’t rub against any parts of the mower housing.
- Reconnect the spark plug.
- Test the mower: After a thorough check, start the mower briefly to ensure everything works correctly.
And that’s it! You’ve successfully sharpened or replaced your lawnmower blade. Aren’t you proud? Now get out there and enjoy a perfectly manicured lawn!
Lawn Mower Carburetor Cleaning and Maintenance
Let’s tackle a common lawn mower problem: carburetor issues. This is often the culprit when your mower won’t start, sputters, or runs poorly. So, let’s dive into cleaning and maintaining this crucial component.
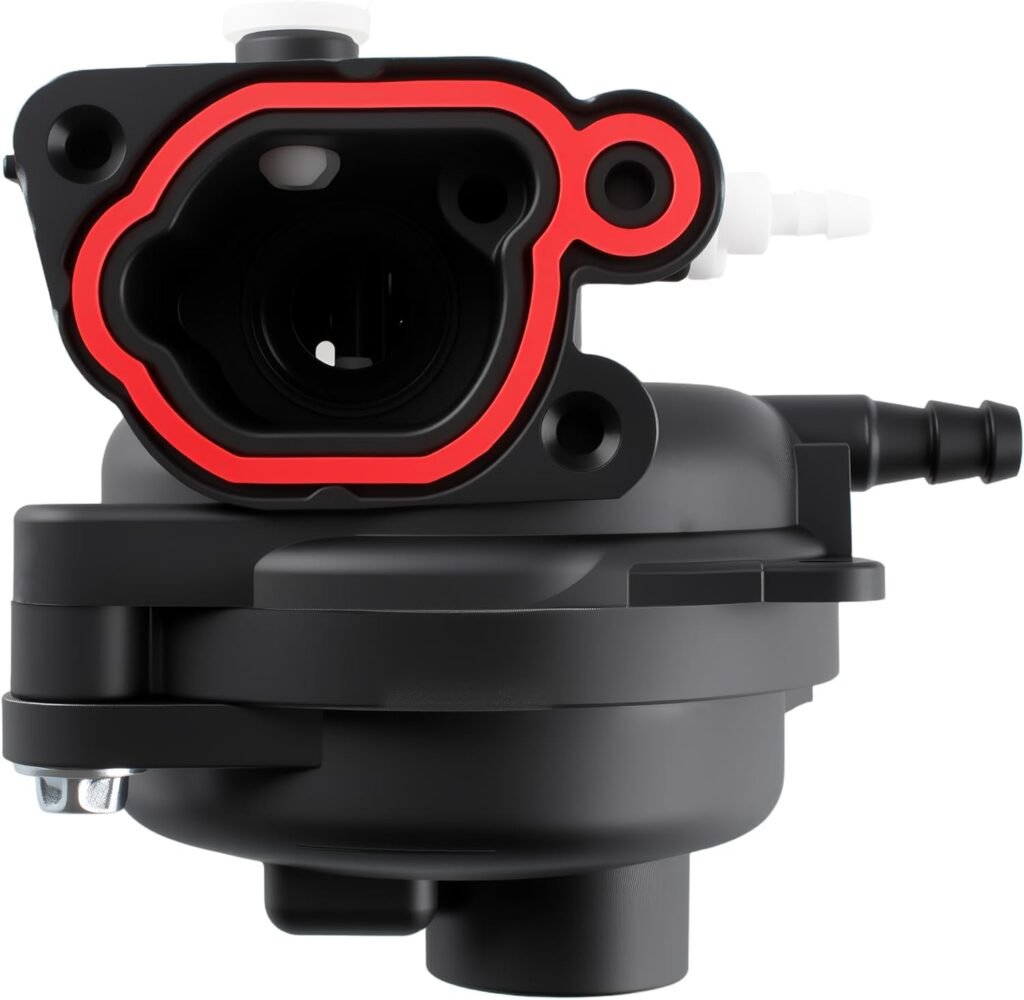
Identifying carburetor problems (clogging, fuel delivery issues)
Before you even think about disassembling anything, you need to know if the carburetor is actually the problem. Symptoms of a dirty or faulty carburetor include difficulty starting, sputtering or stalling, inconsistent running, and a lack of power. If you’ve checked your spark plug (hopefully you did!), fuel supply (is the tank full?), and air filter (is it clogged?), and the mower’s still misbehaving, it’s highly likely the carburetor needs attention. I once spent ages troubleshooting a mower only to discover a tiny pebble lodged in the fuel line—a much simpler fix than a carburetor overhaul! Wouldn’t that have been frustrating?
Using carburetor cleaner and tools
You’ll need the right tools and supplies for this job. Don’t worry, it’s not rocket science, but a bit of care will make the process easier. Here’s what you should gather:
| Item | Description |
|---|---|
| Carburetor cleaner | Specifically designed for carburetors |
| Small screwdrivers | Phillips and flathead, various sizes |
| Wire brush | For cleaning jets and passages |
| Compressed air | To blow out debris |
| Rags or shop towels | For cleaning and absorbing fuel |
| Container for parts | To keep everything organized and prevent loss |
| Disposable gloves | To protect your hands from fuel and carburetor cleaner |
Here’s a list of additional helpful items:
* A small bowl to soak carburetor parts
* Needle-nose pliers (sometimes helpful for tiny parts)
* A magnifying glass (for inspecting tiny passages)
(Replace “placeholder_image.jpg” with an actual image)
Disassembling and cleaning the carburetor (step-by-step)
Remember to always disconnect the spark plug before you begin any work on the carburetor (safety first!). Now, let’s get to the cleaning process:
- Remove the carburetor: This will vary depending on your mower model, so consult your owner’s manual. Generally, it involves removing some screws and fuel lines.
- Disassemble carefully: Gently unscrew and separate the various components of the carburetor. Take photos as you go! It’s way easier to reassemble if you have a visual guide.
- Clean each component: Use the carburetor cleaner and wire brush to clean the jets, passages, and any other parts that look dirty or clogged. Pay attention to even the tiniest openings.
- Soak (optional): You can soak some smaller, removable parts in carburetor cleaner for a deeper clean.
- Rinse and dry: Once cleaned, thoroughly rinse all parts with compressed air to remove any remaining residue. Let them dry completely.
Reassembling and testing the carburetor
Now comes the meticulous task of putting everything back together. Double-check that everything is in its proper place and is tightly secured.
“Remember, patience is key. Don’t rush this step; a single misplaced part can lead to more problems down the line.” —My grandpa, a seasoned mechanic
Once reassembled, reinstall the carburetor onto the engine, reconnect the fuel lines and spark plug. Start your mower. If it runs smoothly, congratulations! You’ve successfully cleaned and repaired your lawn mower’s carburetor. If you still experience problems, there might be a more serious underlying issue. Don’t be afraid to seek professional help. You’ve already learned a valuable skill, though!
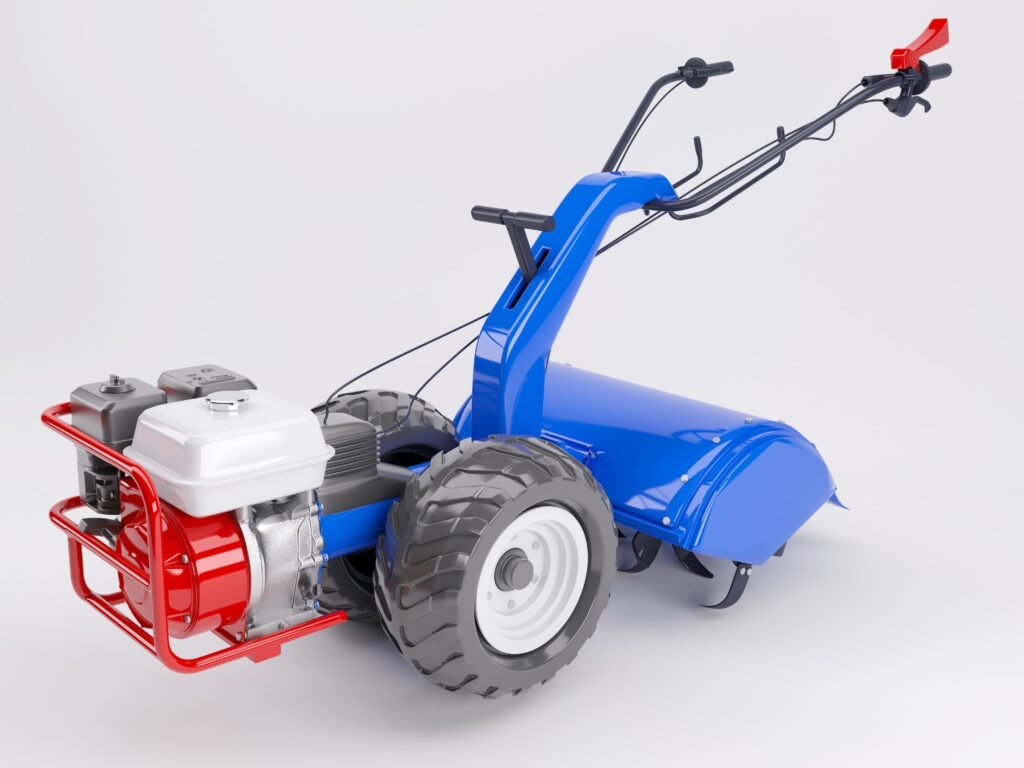
Repairing a Riding Lawn Mower: Specific Challenges
So, you’ve tackled push mowers and feel confident in your wrench-turning abilities? Great! But riding lawn mowers are a whole different beast. They’re more complex machines with more powerful engines and intricate systems. This section focuses on the unique challenges you’ll face when tackling these larger, more powerful lawn care workhorses. Let’s dive into what makes repairing a riding mower different.
Belt Replacement and Tension Adjustment
Riding mowers rely heavily on belts to transfer power from the engine to the blades and other components. These belts wear out, snap, or slip, often leaving you with a non-functional mower. Replacing them isn’t rocket science (though it might feel like it at first!), but it does require some patience and the right tools.
First, you’ll need to locate the appropriate belt diagram in your owner’s manual – trust me, this is crucial. Then, carefully remove any shrouds or guards to access the belts. You’ll likely need to loosen tensioning mechanisms (usually pulleys or springs) before you can remove the old belt. This is often where you’ll need a wrench or socket set. Remember to consult your manual!
“Don’t underestimate the importance of proper belt tension. Too loose, and the belt will slip; too tight, and you’ll risk damaging components.”
Installing a new belt is the reverse process. Ensure the belt is seated correctly in all the pulleys before tightening the tensioner. If you don’t get the tension just right, you’ll be back here again soon. Here’s a quick tip: a slight squeal when you first start the engine is normal (and often disappears after a short time), but a loud persistent squeal signifies insufficient tension.
Diagnosing Transmission Problems
Riding mowers often employ either manual gearboxes or, more commonly, hydrostatic transmissions (HSTs). While both can malfunction, HSTs present unique challenges for repair. Have you ever had a sudden loss of power, or maybe a stubborn mower that refuses to move forward (or backward)? These might indicate a problem with the hydrostatic transmission.
Unlike a manual gearbox which uses gears, an HST uses hydraulic fluid to transfer power and change speed. (It’s basically a fancy hydraulic pump). Diagnosing these problems often requires more specialized knowledge and tools. It involves checking fluid levels, identifying leaks, and potentially inspecting the pump itself. Sometimes, it’s a simple fluid top-off. Other times…it’s significantly more involved.
Here’s a simple checklist for troubleshooting a sluggish or non-functioning HST:
- Check the transmission fluid level. (Is it low? Is it dirty?)
- Look for leaks around the transmission.
- Listen for unusual noises from the transmission.
- Inspect the drive belts for wear or damage.
If you’re uncomfortable working on an HST, it’s best to consult a professional. I know I was intimidated my first time. Remember, safety first!
Safety Procedures for Working on Riding Mowers:
Before you even think about touching a wrench, remember these crucial safety steps:
- Disconnect the spark plug: This prevents accidental starting. (Trust me, this is non-negotiable).
- Wear safety glasses and gloves: You’ll be working with sharp metal and potentially hot parts.
- Work in a well-ventilated area: Exhaust fumes are dangerous.
- Use jack stands: Never work under a mower supported only by a jack.
- Consult your owner’s manual: This is your bible for repair procedures.
Remember, if you’re unsure about anything, don’t hesitate to seek professional help. A small repair job gone wrong can cost you far more in the long run than paying a mechanic. It’s better to be safe than sorry! Besides, isn’t a perfectly manicured lawn worth a little extra effort (or money, sometimes)?
Lawn Mower Parts Replacement: Sourcing and Installation
So, you’ve diagnosed the problem with your lawnmower, and it’s time to replace some parts. Now what? Don’t worry, finding and installing replacement parts isn’t as daunting as it might seem. Let’s break it down. The first step is sourcing those parts, and that’s where you’ve got options!
Sources for genuine vs. aftermarket parts
You’ll quickly discover there are two main avenues for finding lawnmower parts: genuine parts directly from the manufacturer or dealer, and aftermarket parts from various suppliers. Genuine parts are, naturally, made by the original equipment manufacturer (OEM). They’re generally more expensive but often come with a warranty and are guaranteed to fit perfectly. Aftermarket parts are made by other companies and are usually cheaper. However, quality can vary significantly. I once bought a cheap aftermarket carburetor (a costly mistake!), and it lasted about two mowing sessions before failing again. Learn from my mistake!
Choosing between genuine and aftermarket parts often comes down to budget and your comfort level. If it’s a crucial component, like the engine itself, I’d recommend sticking with genuine parts for reliability. But for smaller, less critical things, an aftermarket option might suffice.
Here’s a table summarizing where you can find parts:
| Source | Type of Part | Pros | Cons |
|---|---|---|---|
| Manufacturer/Dealership | Genuine | Guaranteed fit, warranty, high quality | More expensive |
| Local Hardware Stores | Genuine & Aftermarket | Convenient, often have common parts in stock | Selection might be limited, potentially higher prices |
| Online Retailers (e.g., Amazon, eBay) | Genuine & Aftermarket | Wide selection, price comparison options | Shipping time, potential for counterfeit parts |
Using online resources for part identification
Identifying the correct part number is crucial. You don’t want to order the wrong thing (trust me, it’s frustrating!). Luckily, there are fantastic online resources to help. Start by finding your lawnmower’s model number – usually found on a sticker somewhere on the machine itself. Then:
- Use the manufacturer’s website: Most manufacturers have detailed parts diagrams and online catalogs, where you can locate the exact part you need by typing in the model number.
- Consult online parts databases: Several websites specialize in providing parts diagrams for various lawnmower brands. They often have detailed images and part numbers. (It’s really helpful to have several sources, just to check they all match!)
- Utilize online marketplaces: Sites like eBay often have images of the part; this can be helpful for visual confirmation, although always be cautious of counterfeit parts.
Remember to double-check the part number several times before ordering.
Installing replacement parts requires care and attention. Consult your owner’s manual for specific instructions. Remember safety first! Always disconnect the spark plug before performing any work on the engine. Take your time, work methodically, and if you’re unsure about any step, you can always seek help from a professional. Isn’t it better to be safe than sorry?
This process might seem involved, but with a bit of patience and the right resources, you’ll get your lawnmower back up and running in no time.
Lawn Mower Repair Cost vs. DIY Savings: A Comparison
So, you’ve tackled that sputtering engine or jammed blade, but have you considered the financial aspect of your lawn mower repair project? Let’s weigh the costs of professional repair against the potential savings of a DIY approach. You might be surprised at how much you can save!
Comparing costs of different repair options
Estimating the costs of professional lawn mower repair can be tricky. It depends heavily on the type of mower you own, the severity of the damage, and, of course, the shop you choose. A quick phone call to a local repair shop will give you a ballpark figure. But remember, they’ll likely charge for both parts and labor. Labor charges can really add up (especially if it’s a complicated repair). Part prices themselves vary widely depending on the brand and availability of the specific part. You’ll also find that some shops have a minimum charge for service.
Let’s look at a typical scenario: Last summer, my neighbor’s mower needed a new carburetor. The shop quoted him $150 for the part and $75 for labor. That’s $225! Ouch.
Now, let’s consider the DIY route. Here’s a simplified cost comparison:
| Repair Item | Professional Repair Cost | DIY Repair Cost |
|---|---|---|
| New Spark Plug | $15 (part) + $30 (labor) | $5 (part) |
| Carburetor Cleaning | $75 (labor) | $10 (carb cleaner) |
| Blade Sharpening | $30 (labor) | $20 (sharpening tools) |
| New Blade | $40 (part) + $40 (labor) | $35 (part) |
Assessing the cost-effectiveness of DIY
Calculating the cost savings of DIY repair is pretty straightforward: subtract the DIY cost from the professional repair cost. As you can see from the table, the potential savings can be substantial, especially for simpler repairs like blade sharpening or changing a spark plug. But, there’s more to consider.
What about your time? Is your time worth more than the potential savings? That’s a question only you can answer. (Sometimes, a few hours saved is worth more than a few extra dollars).
“The greatest reward in life is doing what people say you can’t do.” – Unknown
However, there are hidden costs to DIY repairs. You might need to buy special tools. You might also waste time and money on parts that don’t fix the problem. In those cases, your cost savings might be minimal or non-existent.
Factors affecting repair costs include:
- Part prices: Genuine OEM parts are more expensive than aftermarket alternatives.
- Labor charges: Labor rates vary regionally and by the shop’s experience level.
- Diagnosis fees: Some shops charge for diagnosing the problem, even if you don’t proceed with the repair.
So, before you dive into your lawn mower repair, weigh the cost versus the value of your time and skills. Sometimes it’s just more cost-effective to call a professional. But, often, a little DIY effort can save you a considerable amount of money.
Preventive Maintenance for a Long-Lasting Lawn Mower
So, you’ve learned how to fix a variety of lawn mower problems. That’s fantastic! But the best way to avoid repairs altogether? Preventive maintenance. Think of it as proactive healthcare for your mower – much easier (and cheaper!) than emergency surgery. Let’s dive into the secrets to keeping your trusty machine running smoothly for years to come.
This section focuses on regular upkeep, ensuring your mower remains a reliable workhorse. Neglecting these steps is like forgetting to water your prize-winning roses – eventually, they’ll wilt!
Regular cleaning and inspection are paramount. After every mow, take a few minutes to brush off the clippings and debris. Check for loose bolts, damaged blades, and any signs of wear and tear. I once ignored a small crack in my mower deck for months (bad move!), and it eventually resulted in a far more expensive repair. Don’t be like me!
A thorough inspection should include checking the oil level, spark plug condition, and the air filter. You’ll also want to inspect belts, blades and the drive system (if applicable). This regular inspection will help you catch minor issues before they become major headaches.
Remember, prevention is better than cure, so let’s establish a routine.
Seasonal Maintenance Schedules
It’s helpful to think in terms of seasons. Here’s a suggested schedule:
| Season | Task | Frequency |
|---|---|---|
| Spring | Clean and inspect; change oil; sharpen blades | Before first use |
| Summer | Clean after each use; check oil level | Weekly |
| Autumn | Drain gas; clean; store in a dry place | After last use |
| Winter | Inspect; cover (if stored outdoors) | Monthly |
You might need to adjust this based on how often you use your mower. If you’re mowing several times a week, you’ll need to do more frequent cleaning and oil checks. But if you only use it a few times a year, the frequency can be reduced.
Air Filter Replacement
A clogged air filter restricts airflow to the engine, leading to reduced power and increased wear. Replacing it is a simple, yet crucial task.
- Locate your air filter (usually a rectangular box near the engine).
- Remove the filter cover.
- Gently remove the old filter, avoiding touching the filter media.
- Install a new filter, ensuring it’s correctly seated.
- Replace the cover.
It’s often cheaper than you’d imagine and it can make a real difference to your engine’s longevity.
Oil Change Procedure
Regular oil changes are essential for maintaining engine health. Dirty oil can cause excessive wear and eventually engine failure. Here’s a step-by-step guide:
- Warm up the engine for a few minutes.
- Position a drain pan under the oil drain plug.
- Carefully remove the drain plug and let the oil drain completely (be careful, it’ll be hot!).
- Replace the drain plug.
- Locate the oil fill cap (often marked with an oil can symbol).
- Add the recommended amount of oil (check your owner’s manual).
- Check the oil level with the dipstick.
Recommended lubrication points include the blade bolts, the wheels, and any moving parts that show signs of dryness. Use a suitable lubricant like WD-40 or a similar product. A little lubrication goes a long way in preventing squeaks, rust, and premature wear.
And lastly, aren’t you glad you read this? You’ve invested in your lawn mower, now invest the time to ensure a long and productive relationship. Proper maintenance not only extends the life of your machine but also saves you money in the long run. Isn’t that a win-win?
So, there you have it – a comprehensive guide to lawn mower repair. We’ve covered a lot of ground, from diagnosing common problems like a clogged air filter or a faulty spark plug, to tackling more involved repairs like blade sharpening and carburetor cleaning. Remember those key steps: thorough inspection, careful disassembly, precise cleaning, and accurate reassembly. These aren’t just steps; they’re the foundation of successful lawn mower maintenance.
The main takeaway? You don’t need to be a mechanic to handle many common lawn mower repair issues. With a little patience, the right tools, and this guide as your companion, you can save yourself a significant amount of money and potentially avoid frustrating trips to the repair shop. Imagine this: a sunny Saturday afternoon, your perfectly mowed lawn a testament to your DIY skills. That’s the reward for investing a little time in learning the basics of lawn mower upkeep.
Personally, I’ve wrestled with my share of stubborn lawn mowers, and I know how satisfying it is to get that engine roaring back to life. It’s a feeling of accomplishment, a small victory over a mechanical challenge.
Beyond the immediate benefits, regular maintenance, as outlined in this article, will extend the life of your mower significantly. Think of it as preventative care – a small investment now that pays dividends in the long run.
What are you waiting for? Grab your tools, consult the guide again if needed, and tackle that nagging lawn mower problem. Let me know in the comments how your repair went! Did you encounter any unexpected challenges? We’d love to hear your stories and share tips.
Frequently Asked Questions
What is the average cost to repair a lawn mower, and what factors influence the price?
The cost to repair a lawn mower varies greatly depending on the problem, the type of mower (push, self-propelled, riding), and the parts needed. A simple fix like sharpening the blade might only cost you the price of a sharpening stone ($10-$20), while a major repair like replacing the engine could cost several hundred dollars. Factors influencing the price include the cost of parts (which can vary widely depending on the brand and availability), labor costs if you hire a professional, and the complexity of the repair. For example, replacing a spark plug is much cheaper than fixing a broken transmission. Before starting any repair, it’s wise to get a quote from a local repair shop to avoid unexpected expenses. Always factor in the cost of new parts versus the cost of a new lawn mower; sometimes replacing the mower is the more cost-effective option.
Where can I find quality replacement parts for my lawn mower, both online and locally?
Finding replacement parts for your lawn mower is easier than you think! First, identify your lawn mower’s make, model, and engine type (usually found on a sticker on the mower deck or engine). This information is crucial for ordering the correct parts. Locally, you can check with your local hardware store, small engine repair shops, or even some larger home improvement stores. Online, major retailers like Amazon, eBay, and dedicated small engine parts websites offer a wide selection. When searching online, use specific keywords like “replace [your lawnmower’s model] carburetor” or “[your lawnmower’s model] blade.” Always compare prices and read reviews before purchasing. Make sure the parts are compatible with your lawn mower model to ensure a proper fit and function.
What safety precautions should I take when attempting lawn mower repair?
Safety is paramount when performing any lawn mower repair. Always disconnect the spark plug wire before starting any work to prevent accidental starting. Wear safety glasses to protect your eyes from flying debris, and use work gloves to protect your hands. If you’re working with fuel, do so in a well-ventilated area and avoid open flames. Never attempt repairs while the engine is running. If you’re unsure about any aspect of the repair, consult the owner’s manual or seek professional help. Working on a riding lawn mower adds additional safety concerns; ensure the parking brake is engaged and that the mower is stable before undertaking any repairs. Remember, a small injury can quickly escalate with this powerful equipment.
How often should I sharpen my lawn mower blade to ensure optimal cutting performance?
Sharpening your lawn mower blade is essential for a clean cut and to prolong the life of your mower. You should aim to sharpen your blade at least once a year, or even more frequently depending on how often you use your lawn mower. Dull blades tear the grass, leaving ragged edges and making your lawn more susceptible to disease. Signs of a dull blade include uneven cuts, grass being ripped instead of cleanly cut, and the mower requiring more effort to push. Sharpening can be done with a file, a bench grinder, or by a professional. A properly sharpened blade will make your lawn mower significantly more efficient and provide a better cut.
How do I know if my lawn mower needs a new carburetor and what are the steps to diagnose this problem?
A faulty carburetor can cause various issues with your lawn mower, including difficulty starting, poor running, or stalling. Signs of a failing carburetor include inconsistent engine running, sputtering, difficulty starting, or a noticeable lack of power. If your lawn mower exhibits these symptoms, the carburetor may require cleaning or replacement. You can try cleaning the carburetor yourself using a carburetor cleaner and compressed air; many online tutorials guide you through this process. However, if cleaning doesn’t resolve the problem, it’s likely the carburetor needs replacing. Remember to properly diagnose the problem before replacing parts; sometimes the issue can be something simpler, like a clogged air filter. If you lack experience with lawn mower repair, seeking professional help is recommended to avoid potential damage.
What are the signs of a worn-out lawn mower engine, and when is it time for engine repair or replacement?
A worn-out lawn mower engine will show several telltale signs. Difficult starting, excessive smoke from the exhaust, loss of power, unusual noises (knocking or rattling), and leaking oil are all major indicators. If your lawn mower engine is consistently overheating, burning excessive oil, or producing low compression, it’s likely nearing the end of its lifespan. Sometimes, an engine overhaul (rebuilding) might be a cost-effective solution; however, if the damage is extensive or the engine is old, replacing the engine might be a better long-term investment. Consider the cost of repair versus replacement before making a decision. Proper lawn mower maintenance, including regular oil changes, will extend the engine’s life.
Can I repair my riding lawn mower myself, or should I call a professional for riding lawn mower repair?
Repairing a riding lawn mower yourself is possible, but it’s considerably more complex than fixing a push mower due to its size and the integration of many mechanical parts. If you’re mechanically inclined and comfortable working with larger engines and power equipment, attempting repairs yourself might be an option. However, riding lawn mowers have sophisticated components and safety systems, and improper repair could lead to serious injury or further damage. For significant repairs or if you lack experience, calling a professional is strongly recommended. A professional technician has the tools, expertise, and knowledge of safety procedures to handle the repair safely and efficiently, saving you time, frustration, and potential injury. They can also diagnose more complex problems effectively.